
So I am back in the shed to complete the build. it's bloomin' freezing so my little fan heater is working overtime!
The H2 comes with all the parts to build the car in mid or rear motor formats, I have chosen to build my car as mid motor as I will be racing primarily on astro.
(If you decide on the rear motor configuration some of the following will still apply but keep an eye on the manual.)
At this point the H2 offers something a little different from the norm in the shape of a hinged battery retaining system.
Tip: It is possible to use either full size or stubby type cells in the car, the small L shaped retaining piece can be fitted to the forward or rearward pair of holes in the top plate depending on your choice.
The hinged top plate also acts as the mounting plate for the electrics, this can be seen in the electrics install blog post.

I assembled mine to accept a full size 2s pack.

From this point onwards a little 'interpretation' of the manual is required, hopefully the following will help with your build decisions.
The gearbox.
The manual encourages the mid motor builder to assemble the gearbox in a 3 gear configuration, thus placing the motor plate on the right hand side of the car. The accepted wisdom for a modern 2wd mid motor buggy is to utilise a 4 gear box, thus placing the motor plate on the left side of the car, this is what I would suggest for the H2.
Durango call this configuration MM4, and this box is uncannily similar to that found in the Durango 210.
TIP: For a great explanation of the various gearbox options and their relative merits take a look HERE.
Look familiar?
Identify and gather together the required parts.
Hopefully you have remembered where you put the previously prepared diff because it's time to drop it in.

This is what you need to assemble an 'MM4' gearbox.

This is what it should look like when you have found the right place for everything.

The motor plate bolts on with three long m3 screws, don't forget the spacers required to make sure everything sits nicely.


Assemble the slipper assembly as per the manual, it's one of those jobs that needs three hands and is a good test of your patience.
TIP: Pre compress the slipper spring with a pair of pliers, I find this helps with adjustment and consistency on the finished car.

If all goes well you should end up with something that looks like this . . Nice!

This is the rear hinge pin arrangement, more initiative is required with regard to the anti-squat shims. After discussion with other H2 owners, thanks chaps, I have managed to work out how this is supposed to work.
TIP:
There are two types of shim supplied, one rounded and one rectangular (see pic below) these are marked 0 and 1.
On top of the rear hinge pin mount use the thicker of the two rounded shims, marked 0.
The anti-squat setting can then be adjusted using the various thickness shims above and below the front hinge pin mount, the rounded one above, the rectangular one below.
To ensure the gearbox sits level and at the correct height the total thickness of these two shims together must equal the thickness of the shim above the rear hinge pin mount.
Confused?
It will make sense when it's in front of you, I hope!

Once I'd managed to work this out the installation of the gearbox and lower arms was straightforward. It's a fiddly job and a bit of a pain to jiggle everything into place but a perfect fit.
The installation of the rear shock tower gives us cause, once again, to deviate from the manual.
Hobao tell us that the shock tower should be fitted with the shocks on the front, this would be perfect for the rear motor configuration but not for mid, the problem being that this prevents the use of all adjustment positions due to them fouling the slipper assembly.
TIP: Reverse the entire shock tower, it fits perfectly either way, this allows use of the full range of shock positions. There is a theory that this will also make the car a little easier to drive. The rear wing also needs trimming to clear the shocks, this can be seen in the final pics.


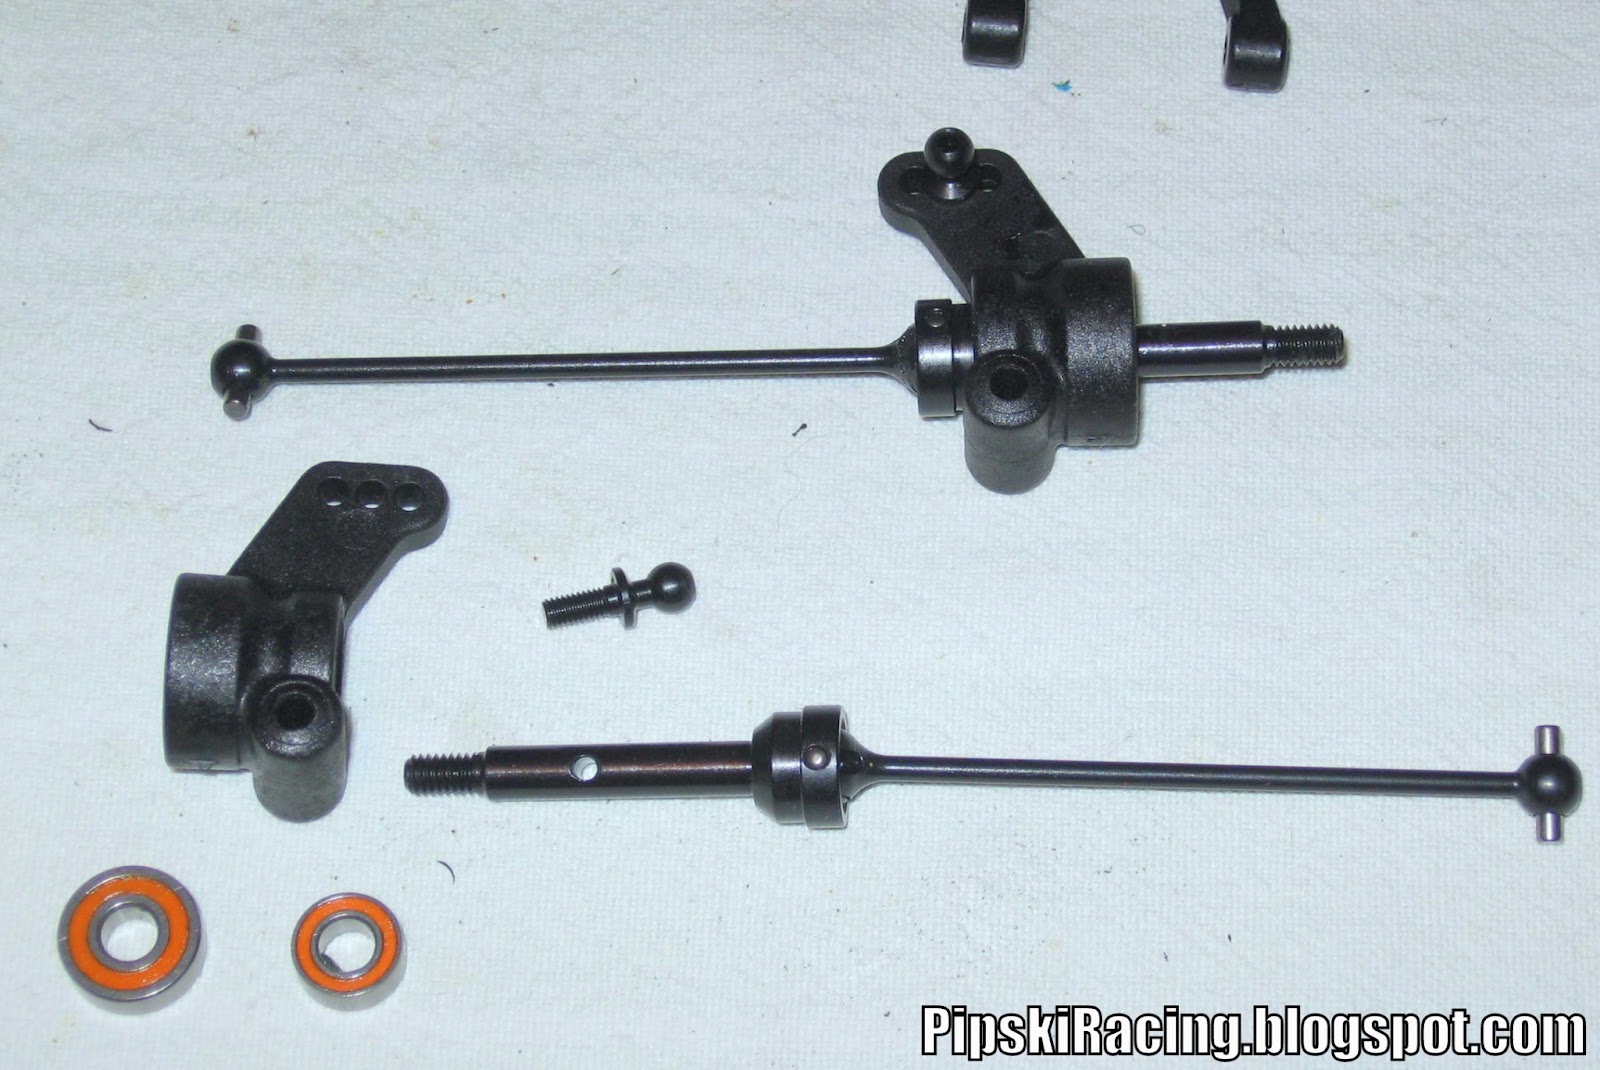
The drive-shafts come pre-built, just add a little graphite grease and you're good to go.
It's a simple and satisfying job to attach the shocks.


So that's the basic build pretty much complete, it always gives me a warm fuzzy feeling.
There is plenty to feel fuzzy about too as this kit is a steal at it's price point.
As I mentioned in part one of this article all the parts appear to be of decent quality and stand comparison to kits with much higher price tags. Once you work out how to interpret the manual they also fit together very nicely.

Add nice little touches like this tasty etched chassis and one has every reason to feel very satisfied with what £135 can buy.

The included body shell is unique and will make this car unmistakable on track, it is of the traditional rearward cab variety and can be made to look pretty cool with the right paint job. Depending on your electrical layout it would probably be possible to fit a cab forward shell designed for a TLR22, should you be inclined.

I have already squirted some paint at the shell, I had a rummage in my paints box and found some colours that I thought looked pretty good together, it's a mix of Createx and Pactra paint for those that care about such things.
I am pleased with the result.

Some tyres are glued up and I will be heading off to my local club, TORCH, to give it a run.
I will report back and let you know how it performs in my, decidedly average, hands.

I suspect you are on the verge of nodding off so I will save my electrical install for another blog entry in a day or two.
Now I just have to stop myself calling it a Hobo!
If you see me feel free to stop by my pit table, say hello, and take a look at the car.
Thanks for reading, I hope I've helped.
No comments:
Post a Comment